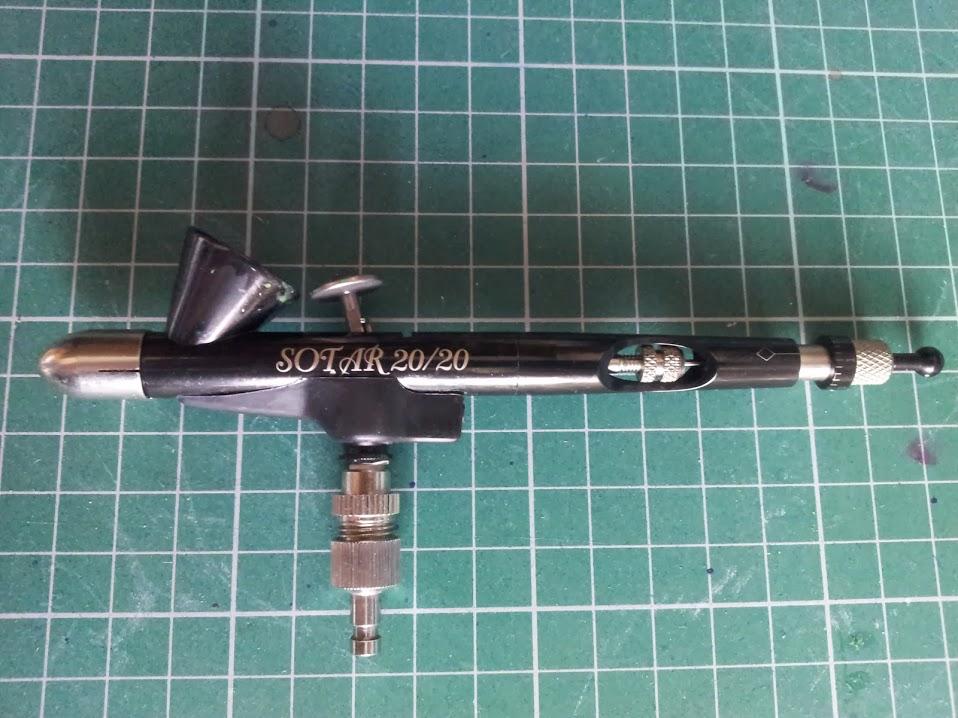
AIRBRUSH - H&S Infinity. Badger SOTAR.
PAINT - Com Art (Not reduced). Auto Air (up to 50% reduction)
PRESSURE - Variable <40 psi
MEDIA - 250gsm Bristol Board
TIME TAKEN - 10 hours
PAINT - Com Art (Not reduced). Auto Air (up to 50% reduction)
PRESSURE - Variable <40 psi
MEDIA - 250gsm Bristol Board
TIME TAKEN - 10 hours
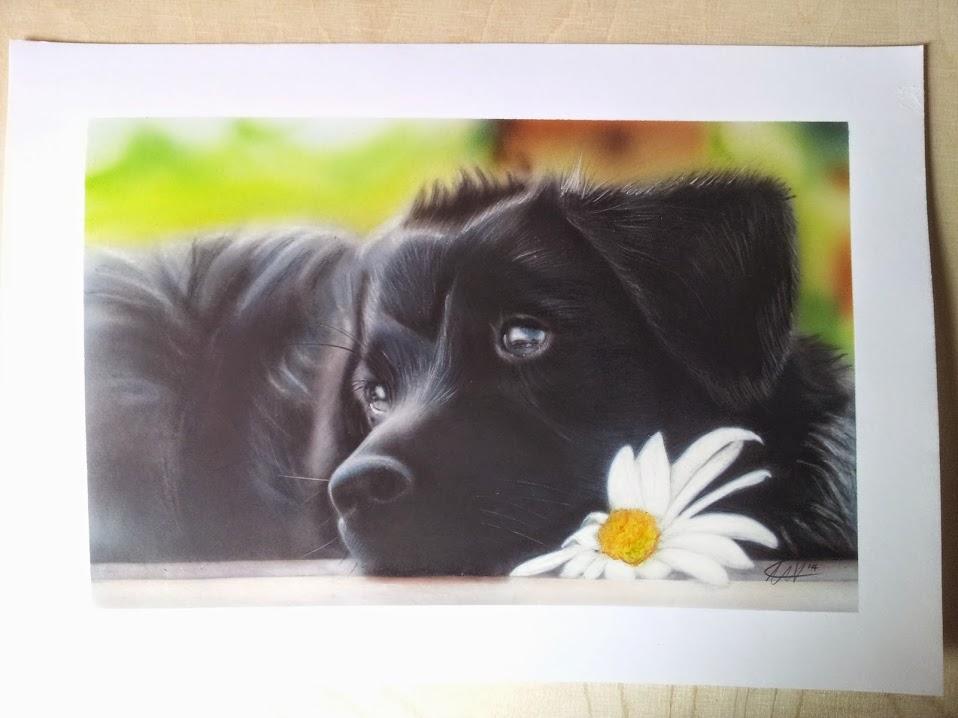
Finished work
My parents recently made a permanent move back to the UK from their retirement place in Europe and, because of the quarantine process, they had to leave their cat and dog behind for quite a few weeks. I thought it would be nice if I could paint something that would be a reminder for them and that could be a house warming gift for their new home.
I don't have any photos of either of their pets, and I didn't want to ask them for one as I wanted this to be a surprise, so I scoured the internet until I found something I thought they would like.
The Labrador in the picture looks like how I remember their dog when he was much younger so I chose that and made a start straight away.
As before, I used tracedown paper to copy the reference image onto the paper.


I call the next stage after the outline my 'mapping' stage as I lightly fill in the picture by lightly shading in the darker areas and putting down the direction of the hairs. At this stage I only use the airbrush, and I'm not too fussed if I go over the outline or make areas darker than they should be as I'll adjust as I go.

I've now added more shading to the body and more hair lines to the face with the airbrush.
Using the fibre glass eraser and a pencil-eraser I add texture and depth to the face, body and ear. This is a process I'm still learning and so it looks a little patchy in places. Again, I'm not too fussed right now as I can go over whatever I need to.
Using the fibre glass eraser and a pencil-eraser I add texture and depth to the face, body and ear. This is a process I'm still learning and so it looks a little patchy in places. Again, I'm not too fussed right now as I can go over whatever I need to.

More lines with the airbrush and more work with the erasers. Many thin coats of paint followed by the eraser. I'm not sure exactly how many passes I made but it's well in to the double figures.
This time for the shading I added a little blue on top of the black. You can barely see the blue, but I will add more and more as the project goes on.
More defined shading to the face and ear, followed by careful use of the fibreglass eraser. This process takes so long, but with each pass more and more depth is built up.
I also made a start on the eye as I prefer my work to have a little life to it!

More shading on the snout. Although it's difficult to make out here there are lots of layers of hair under the black paint.
More layers have been put on the body and the harsh lines on the face have been smoothed.
More layers have been put on the body and the harsh lines on the face have been smoothed.

The blue is more visible here and is beginning to come to life. I love the eyes! You can't tell in this picture but there is a large amount of detail in them. When looking at the actual painting the eyes add another dimension!
The body in the reference image is slightly out of focus so I have tried to follow this using a thick eraser along with the fibreglass eraser.
The body in the reference image is slightly out of focus so I have tried to follow this using a thick eraser along with the fibreglass eraser.

Final bits of detail are added here. The shading is finished off and any final layers of hair are put on with the eraser. I used a heavily diluted blue to cover the black areas in a very light wash. The darker areas are given much more depth, whilst the lighter areas seem to give the affect of reflecting the light in the picture.
At this stage I was thinking about how to add the background. As the dog is black and the background light I always intended to add the background last, but I was slightly worried about overspray on the really light areas..?
At this stage I was thinking about how to add the background. As the dog is black and the background light I always intended to add the background last, but I was slightly worried about overspray on the really light areas..?
I got so involved and carried away with the background and final parts that I didn't take any more photos.
I used a stencil in places around the dog, but the majority of it is freehand.
The flower was completed freehand using white paint and a spluttering airbrush! I hate when this happens!!!
Once the black overspray on the petals was covered, I then used a black to take back the white overspray on the dog caused by the spluttering brush!
I tidied the edges of the pooch and added the fine black hair to the ear and top of the head with a water colour pencil. I also added white highlights using a white water colour pencil. I used both of these pencils for the black and the white whiskers.
So there you go....done!
I absolutely love this picture! It is easily my best work yet. I can still see lots of faults, but they're few and far between and actually don't really detract from the overall picture.
I absolutely love this picture! It is easily my best work yet. I can still see lots of faults, but they're few and far between and actually don't really detract from the overall picture.
If you've been reading my blog you will know that I have recently relocated my airbrushing equipment from my garage to a newly built shed...unfortunately this occurred midway through this painting so although it took me about 10 hours in total, there was actually a break of about 4 or 5 weeks in between!
Suffice to say that my parents now have their pets back home with them and the initiall reason why I wanted to do this has passed!
I know they'll love it and will still give it to them so all is not lost! Just don't tell them yet as I haven't found a frame for it!!!
Suffice to say that my parents now have their pets back home with them and the initiall reason why I wanted to do this has passed!
I know they'll love it and will still give it to them so all is not lost! Just don't tell them yet as I haven't found a frame for it!!!
